
Our RV is getting older, and as such, she’s needing a little maintenance and updating. Hmm, couldn’t we all? 🤣 At least twice a year, Al and I head up to the roof of the RV to check things out. More frequent visits would probably be even better, but when we’re confronted with landscapes that are so stunningly beautiful and beg to be explored, who wants to work on RV projects?

But regular RV maintenance is necessary, and most projects aren’t very difficult; therefore, there’s really no excuse. With that said, it is something we consciously try to make a priority if we want to keep the RV in tip-top shape. Thus, the travel and exploring gets put on hold temporarily while we dive into maintenance projects.
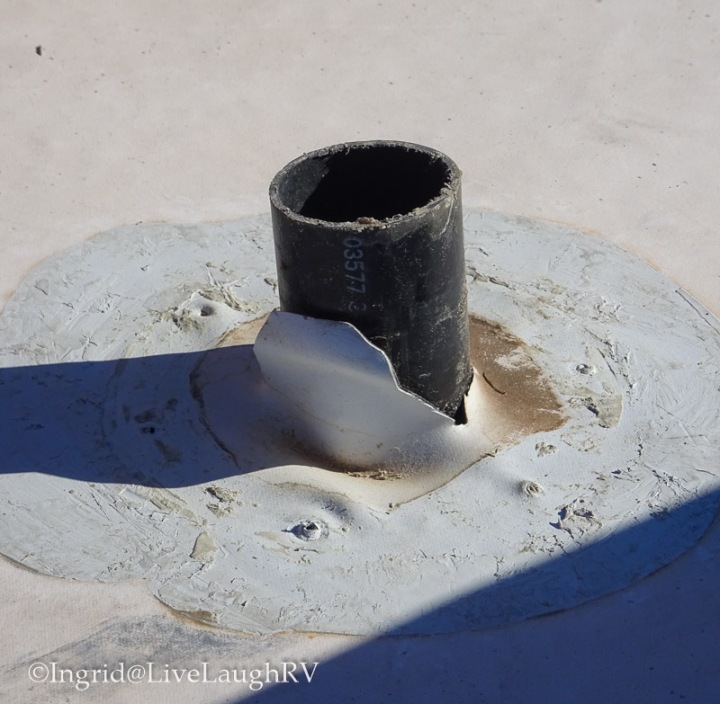
So, up on the roof we go. After checking all the vents, caulking, and general condition of the roof, Al and I determine that the sewer vent caps should be replaced. One cap is severely cracked while the other looks compromised. We’re not sure if they were damaged by hail or a tree branch. Regardless, we’ll replace both caps.
For this post, I’ve partnered with a great RV parts company called Road & Home. Although we’ve received some free goodies from them, all opinions regarding their products are my own. We first discovered Road and Home products during a shopping trip to the local Lowe’s.

RV maintenance made easy
It was a Sunday afternoon, and since most RV dealerships in Arizona are closed on Sundays, we headed to Lowe’s for some general plumbing fittings. We’ve had a tiny fresh water leak in our storage bay that only leaks during the clean water flushing stage of dumping our black tank. It wasn’t an urgent repair, but a needed repair nonetheless. A new fitting should fix up the leak, so off to Lowe’s we go.
Lowe’s had everything we needed to fix the plumbing leak, but much to our surprise (a pleasant surprise), they even had the sewer vent caps that we needed for the roof of the RV. We didn’t even realize Lowe’s carried any RV parts, but there we were standing in front of a large display filled with a variety of RV products from Road and Home.
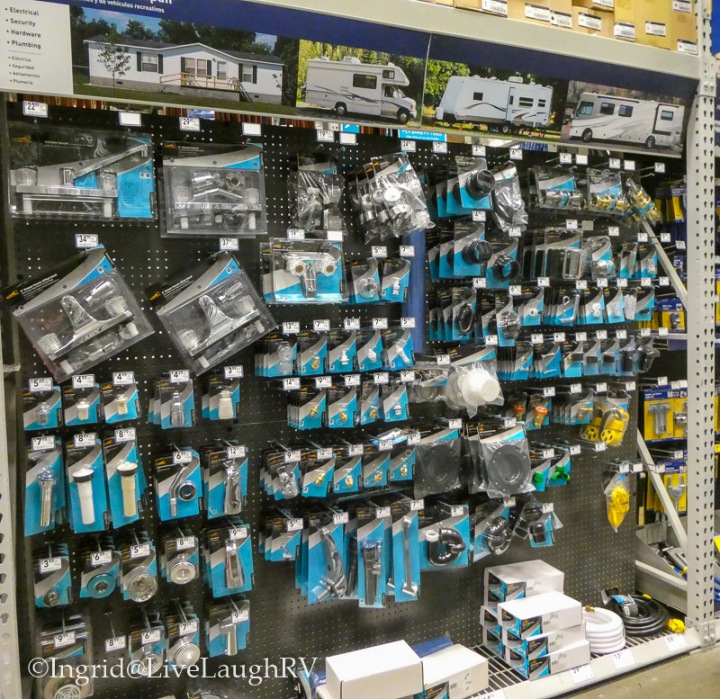
Fifteen minutes later, along with half a dozen products in our shopping cart, it was time to head back to the RV to get to work. With storms expected in the next few days, first and foremost was replacing the roof vent caps.
How to replace a RV sewer vent cap on a rubber roof
Step #1 – The first step is to gently remove the existing vent from the rubber roof. After removing any visible screws, snap off the top cap. With a blow dryer, heat the existing caulk and with a plastic putty knife, gently pry and separate the caulk from the rubber roof. You’ll want to be extremely careful not to rip the rubber roof which is why we don’t recommend using a metal putty knife. This process might be a little slow going, but be patient … we don’t want to compromise the integrity of the rubber roof by damaging it.

Step #2 – Once the old caulk is removed, use a soft clean cloth to wash the area, making sure the surface around the sewer vent pipe is clean. We just used plain water, no soap.
Once the area is dry, lay down a layer of plumber’s putty. We already had a roll of RV sealant/putty in our tool box.

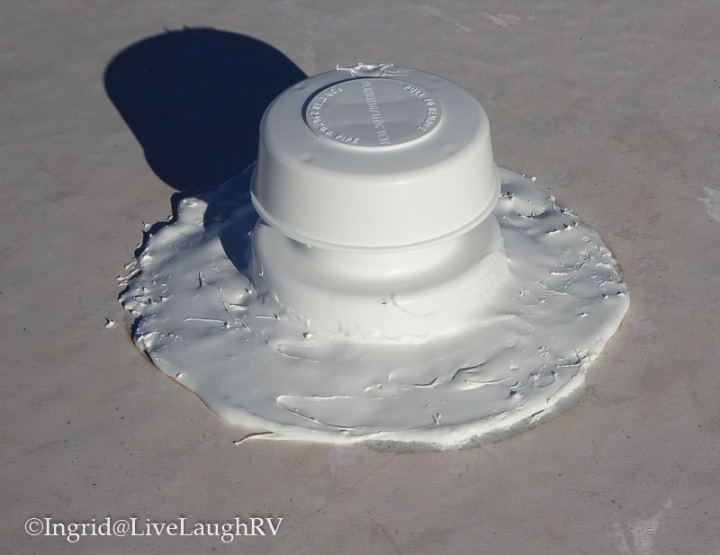
Step #3 – Now it’s time to screw down the bottom section of the vent and install the top cap. The top cap snaps on and there’s one screw on top to hold the cap down.

Step #4 – Now comes the cake decorating portion of the install … otherwise known as caulking. This is when I (aka cake decorator) step in to finish up the job. Using Dicor lap sealant with a caulking gun, I liberally apply a large amount of sealant around the base of the vent, and use the plastic putty knife to help spread out the sealant. This stuff is not normal caulk and may take a little practice to make it look somewhat close to factory install. The tube may say self-leveling, but that doesn’t mean self-smoothing!
Final thoughts
Although replacing both RV roof sewer vent caps was a little time consuming and tedious, overall it was a relatively easy DIY project. Thank you, Road and Home, for making this RV maintenance project even easier with the convenience of being able to buy everything we needed at Lowe’s (available on Amazon too).


(This post is meant for entertainment purposes. Please follow all manufacture recommended guidelines.This post contains sponsored content and affiliate links. For for full disclosure click here)
Road & Home Push/Pull Drain Stopper
Road & Home Roof Vent Cap
Road & Home Shower Faucet
Road & Home Plastic Hose Shut-Off


I’ve always wanted an RV!
LikeLike
We love RVing! It’s the only way to travel.
LikeLike
This is so good to know, thank you! 7/8 of our last RV catastrophes occurred on holiday weekends (4), Sundays (2), or nowhere near an RV place. (I started keeping track because we have ridiculous “luck”). Also, I’ve been up on a few RV roofs and your repair job looks better than some of what I’ve seen come out of the factory or a repair shop. Nice work 👍🏽.
LikeLiked by 1 person
Thanks, obviously we’ve had plenty of practice repairing the RV. It’s part of the adventure. I was thrilled to see these parts at Lowe’s because Walmart never has what we need and we always seem to need something on a Sunday. We’ve had pea size hail the last couple of days, so time for us to head back up on the roof for a ‘how goes it’.
LikeLiked by 1 person
Must be RV maintenance week, we just put in new steps. 1 hour and they were all installed. Dave helped our friends with some maintenance last week, they had never been on their roof. Needless to say it needed a few fixes, between Dicor and Eternabond they’re good to go for awhile.
LikeLiked by 1 person
Yeah, it’s an ongoing thing with RV’s and I have to constantly remind Al to be proactive. He has the attitude of “if it ain’t broke, don’t worry about it” 😪 Thank goodness, I go up on the roof and notice things before they become huge problems… or at least I try 😆
LikeLike
Nicely done! We recently had two repair projects of our own. We had a small hole in the rubber on the roof and somehow got a crack in a waterline fitting that was sucking a lot of air. That was a bugger to find!
LikeLiked by 1 person
Waterline issues are always a puzzle. Glad you found your problem. Yeah, maintenance on RV’s is an ongoing event. I’m glad when they’re easy!
LikeLike
Random inspections are a good idea. Mark installed his own (extended) vent on top of our bathroom with random plumbing parts, to remove any odors. This seems to work well. So far, all we’ve been doing is improving systems and parts on our camper. We do check the engine often. But, compared to our life on a sailboat, where maintenance and projects are never-ending. RV maintenance is “easy”. 🙂
LikeLiked by 1 person
Totally agree …. RVing and RV maintenance is much easier than boating. Once you get your camper van up to your standards, you should get a reprieve from projects and be able to focus on fun travels.
LikeLiked by 1 person
Before we bought our coach, we talked with a full timer who’s comment was – “don’t buy one unless you enjoy working on them” and his worlds were so true.
LikeLiked by 1 person
Smart guy … my dad shared something similar. I’m glad Al and I are handy and can tackle most of the projects ourselves or the RV upkeep would break our budget 😆
LikeLike
Thanks for the step-by-step DIY. I love these types of posts and try to do a few myself when possible. Good work guys!
LikeLiked by 1 person
Thank you Steve. I’m getting better at taking photographs during our DIY projects. One of these days, I hope to dive into video.
LikeLike
Well we don’t have an Rv vent to repair. But it was all quite 🤫 interesting !
Glad you are back at the wheel!
LikeLiked by 1 person
Thanks Nancy. Whether it’s a RV or a regular house, there’s always maintenance and repairs.
LikeLiked by 1 person
No matter where you live you can’t completely escape some home chores…
LikeLiked by 1 person
Isn’t that the truth 😀
LikeLike
We recently replace our standard sewer vent caps with 360 Siphon caps. We had some minor issues with an “aroma” in the coach especially on warmer days. We saw this article from Love Your RV and decided to do a diy install. We really like them, they fixed our smell problem and they work great. There are quite a few you tube videos on installing them as well.
I know you might not be wanting to redo your install but thought you or others might be interested,
LikeLiked by 1 person
Oh, we totally knew about the Siphon caps and considered, but we’ve had no problem with any odors. Therefore, we decided to replace with something identical. Thanks for sharing.
LikeLike
Keep the tutorials coming Ingrid and thanks for taking the time to put it all together.
LikeLiked by 1 person
You welcome Mark. We certainly aren’t experts, but have learned our fair share over the years.
LikeLike
Thanks so much for the tip about finding RV parts at Lowe’s. Now that the roof is good to go you can concentrate on more important things like a wedding!
LikeLiked by 1 person
The 90 cheesecake cupcakes for the dessert bar are in the freezer. Whew! Mother of the groom’s part is done … at least for now 😆 Wedding is less than a month away and I do hope the weather improves. It has been rainy and humid – not good for an outdoor wedding!
LikeLiked by 1 person
Excited for you and your family!
LikeLike
Thank you 😊
LikeLiked by 1 person
DIcor makes two kinds of lap seal. One is self leveling for use on horizontal surfaces. It is available in a number of colors. Dicor says to keep their lap sealant away from heat, sparks and flame.
LikeLiked by 1 person
I’m not sure how often you’ve used Dicor sealant, but we’ve replaced the antenna (twice), a skylight, and now the sewer vent caps. The term ‘self-leveling’ is misleading. This was the first time we used the dryer to help make the caulk look as close to factory install. The other times we didn’t use the blow dryer and the jobs look very diy.
LikeLike
Good to know. Thanks.
LikeLike